Setting up a MailChimp Email Template Personalizes the Service to your Brand

Creating a MailChimp Email Template:
- Navigate to http://mailchimp.com/
- Create an account or log-in
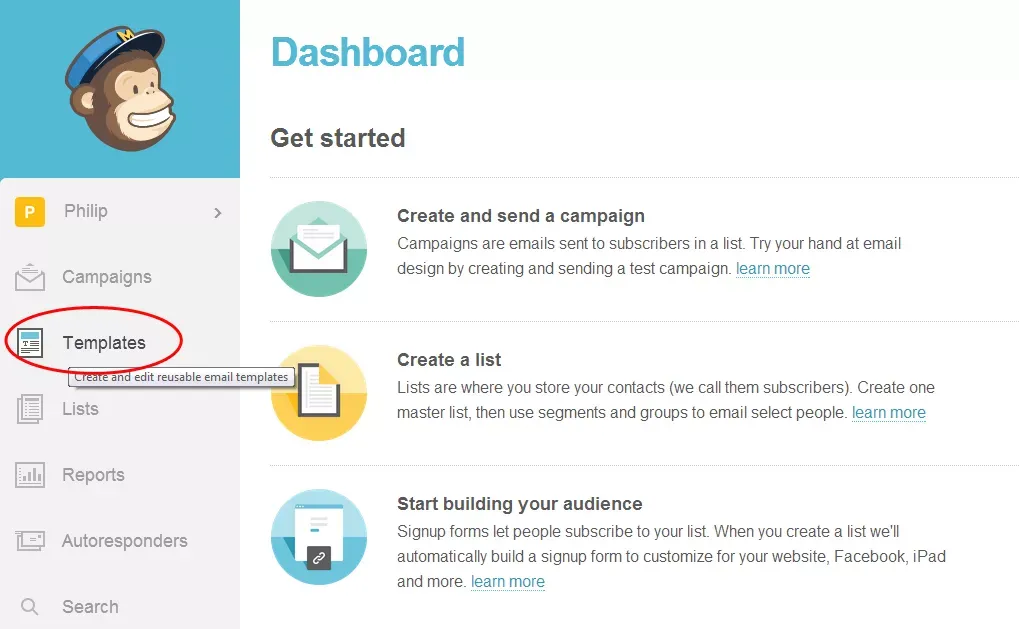
- Click on “Templates” on the left-hand side of your dashboard
Click the “Create Template” button on the top right-hand side. An arrow should point it out. Now you must select a basic template to work off of. I selected “1 Column – Banded” for this tutorial. The area on the left is what the template looks like and the area on the right is where you add and edit content and designs. 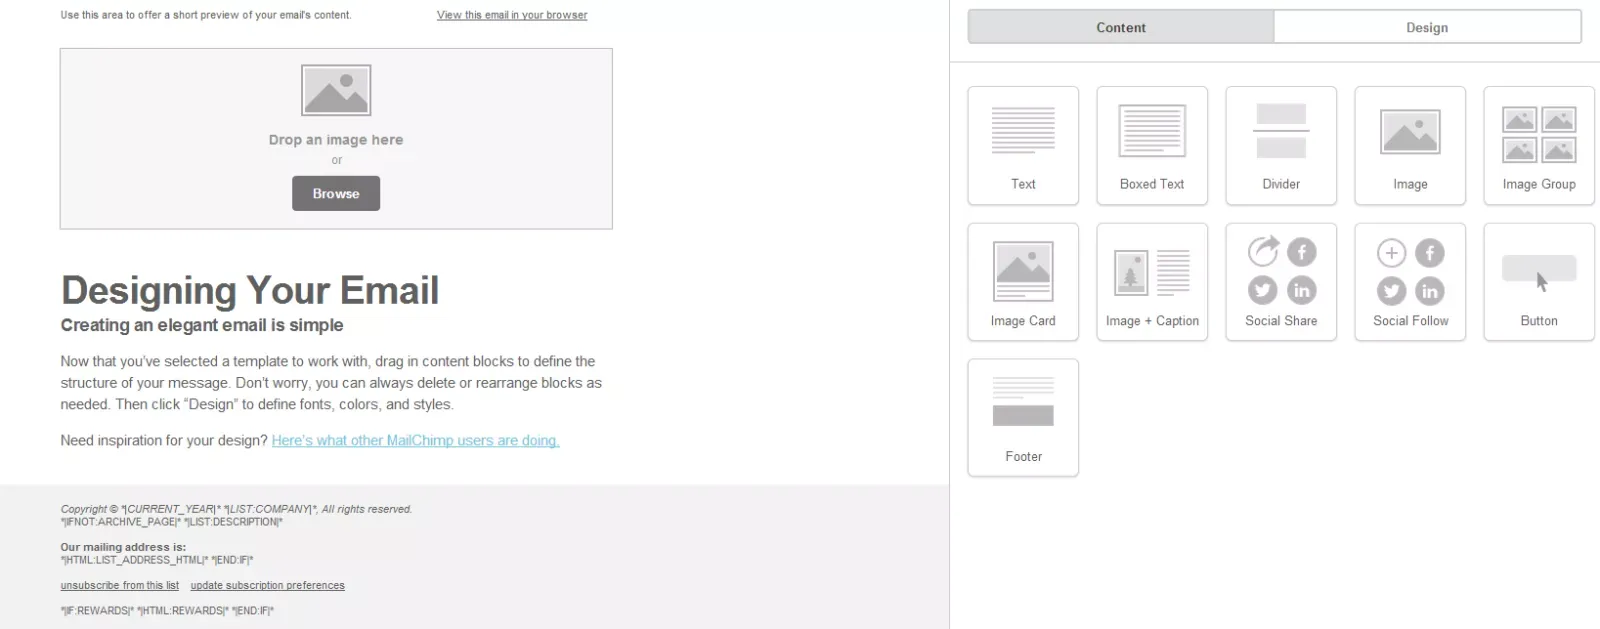
Once you have selected a template, you may edit it by dragging additional field areas by dragging the corresponding icons under “Content” into the email field. Notice the names of each section of the email, Header, Body, Footer. You should remember which area is what for the designing stage. 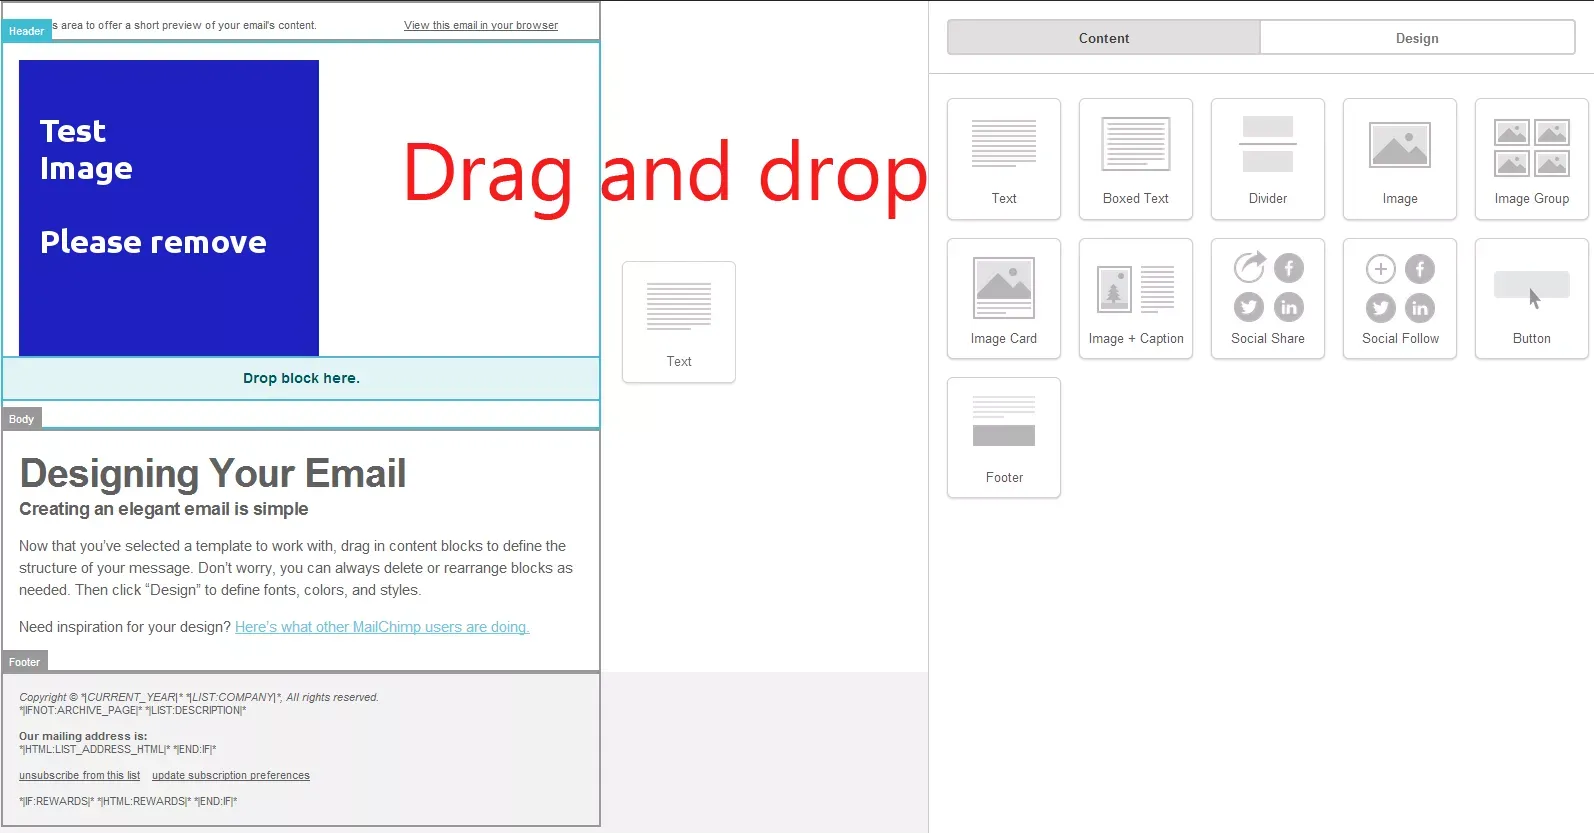
Once you are satisfied with the layout, it is time to add the content!
Uploading Logo/Image-
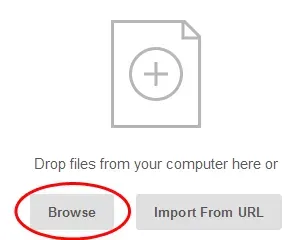
- To add an image, such as your logo, in the indicated field, simply drag and drop the photo in that field or click “Browse”.
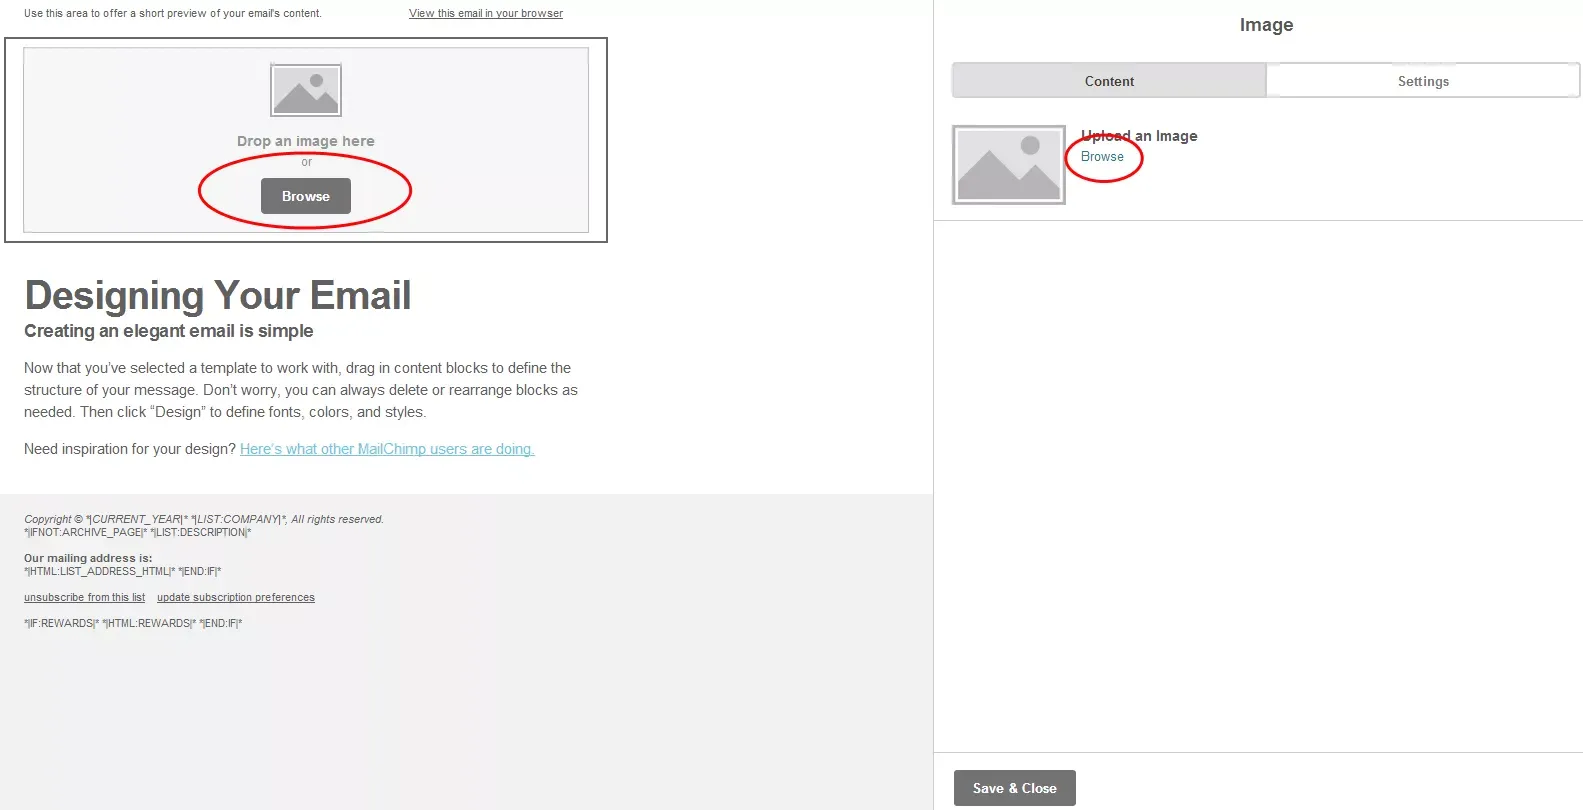
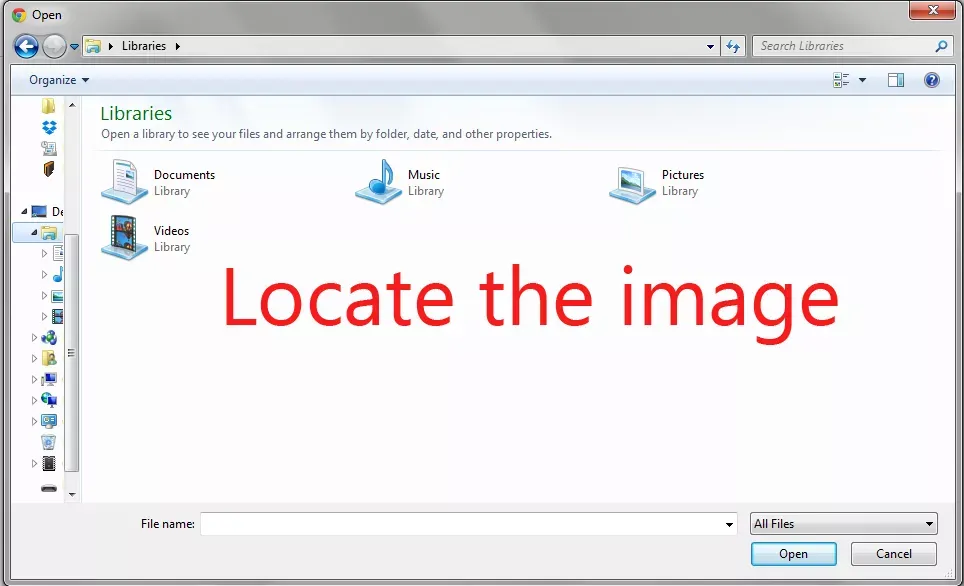
- When it redirects you to the file manager, select Browse again to open up your computer’s directory and locate the picture as shown below. Once you have found your image, click open.
-
- To edit any text areas, simply hover over the field and click on the
 icon.
icon. - You may now edit the field on the right-hand side of the page. Click “Save & Close” when you are done editing a field.
- To edit any text areas, simply hover over the field and click on the
If you include social media links, make sure to add your businesses social media link in the URL area!
Once you completed adding content, it’s time to design it!
- On the top right-hand side of the page, select “Design”.
- You can edit each area of the email.
- For example, if you select “Body”, this is the body of the email and is located under the image. You can edit the background,font colours, add borders and change font sizes and styles. The layout is similar for each section of the email, such as the header.
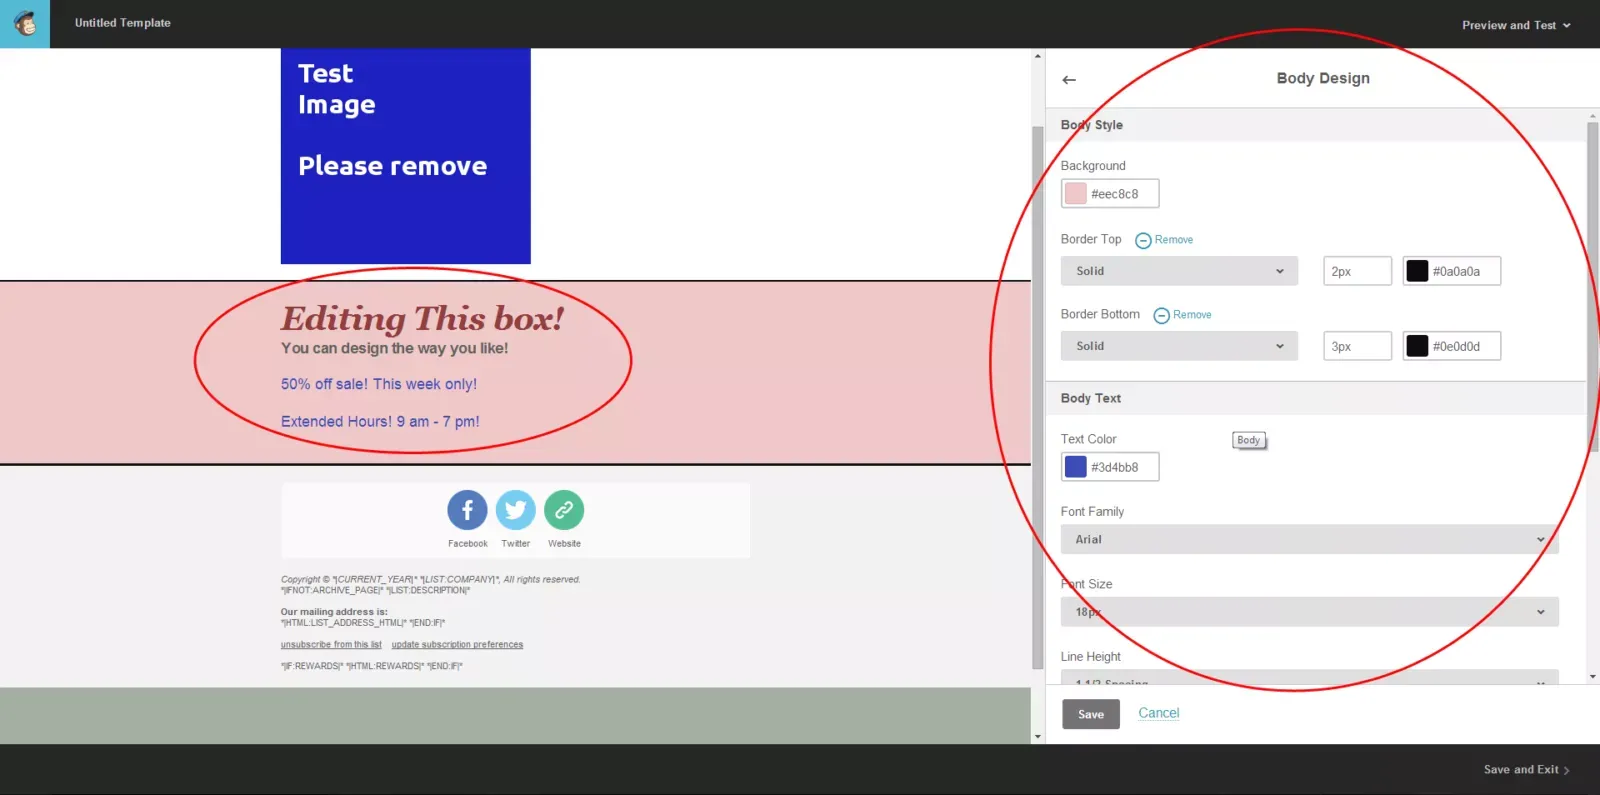
It is recommend to not edit the footer with the copy right and mailing address as it automatically pulls that information from your account.
- Once you are happy with your template, click “Save and Exit” located on the bottom right of the page.
- Name your template, hit save, and your done!
Congratulations you have created a custom template for your business! The template will now be available in the “Template” section. It is recommend to email using this template to yourself first to make sure it is satisfactory to your needs and there are no mistakes.