Step-by-step Instructions to Add a Free Listing to Yellowpages.ca
Yellowpages.ca is a popular directory listing that allows you to find local and national businesses. This blog will show you, step by step, how to add your free listing to Yellowpages.ca.
Step 1: Go to Yellowpages.ca

Scroll to the bottom of the home page. Under the heading ‘Advertisers’, select ‘Add a free listing’. This will open in a new tab.
Step 2: Create an Account
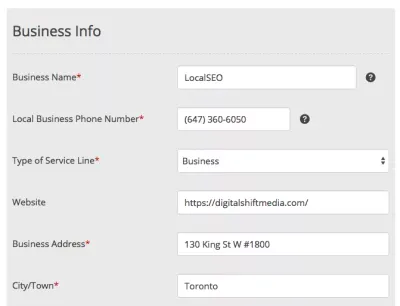
On the right-hand side of the page, you will see a series of input fields under the heading ‘Business Info’. Input all relevant information. When you are finished, select ‘Add your Listing’.
Step 3: Confirmation That You Have Added Your Listing To Yellowpages.ca
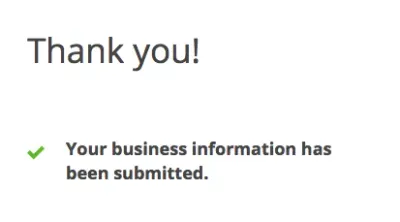
A new page will appear, thanking you for deciding to add your free listing to Yellowpages.ca. You have now added your free listing to Yellowpages.ca with the information that you provided.
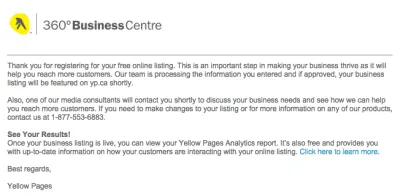
You will receive an email thanking you for your registration, and informing you that the information you have provided will reviewed by the Yellowpages.ca team.
Step 4: Follow Up
Once you add your free listing to Yellowpages.ca, you can create a ‘Business Profile’ to view your free listing, make any changes necessary, and monitor market performance with the Yellowpages.ca Analytics tool.
Need Help With You Online Business Marketing?
Contact us for a one-hour complimentary consultation or check out our Local SEO Business Packages.